
|
Hello User,
Welcome to the page dedicated to otoing UTAU voicebanks. Otoing can be a challenging task, but don't worry, with a positive attitude and some snacks to keep you going, it can be a lot of fun too! To make things easier for you, I've included some base otos that you can use as a starting point. These base otos will help you save time and make the process of otoing your UTAU voicebank a little bit easier. So, let's dive into the world of otoing and get your UTAU voicebank sounding just the way you want it to! If you're looking for an easier way to oto your voicebank, I recommend downloading SetParam. It can save you a lot of time and effort. |
|
1) Core Voicebank
When it comes to otoing voicebanks, there are different methods depending on the language and reclist. For Core CVCV voicebanks, the process is similar to otoing non-Japanese CVVC voicebanks. Simply put the oto.ini file of your chosen reclist in your recording folder, open SetParam and select your folder. Then go through the entire list and put the red line between the consonant and the vowel and keep track of the yellow space cutting off the end of your recording.
However, this is MY way of doing it -
While the method I described works well and doesn't take too long, I understand that some people prefer to edit all of the parameters to achieve the perfect oto. If you're interested in a more detailed explanation, I recommend checking out the Petit Mot CVVC guide which I found to be a great reference.
While the method I described works well and doesn't take too long, I understand that some people prefer to edit all of the parameters to achieve the perfect oto. If you're interested in a more detailed explanation, I recommend checking out the Petit Mot CVVC guide which I found to be a great reference.
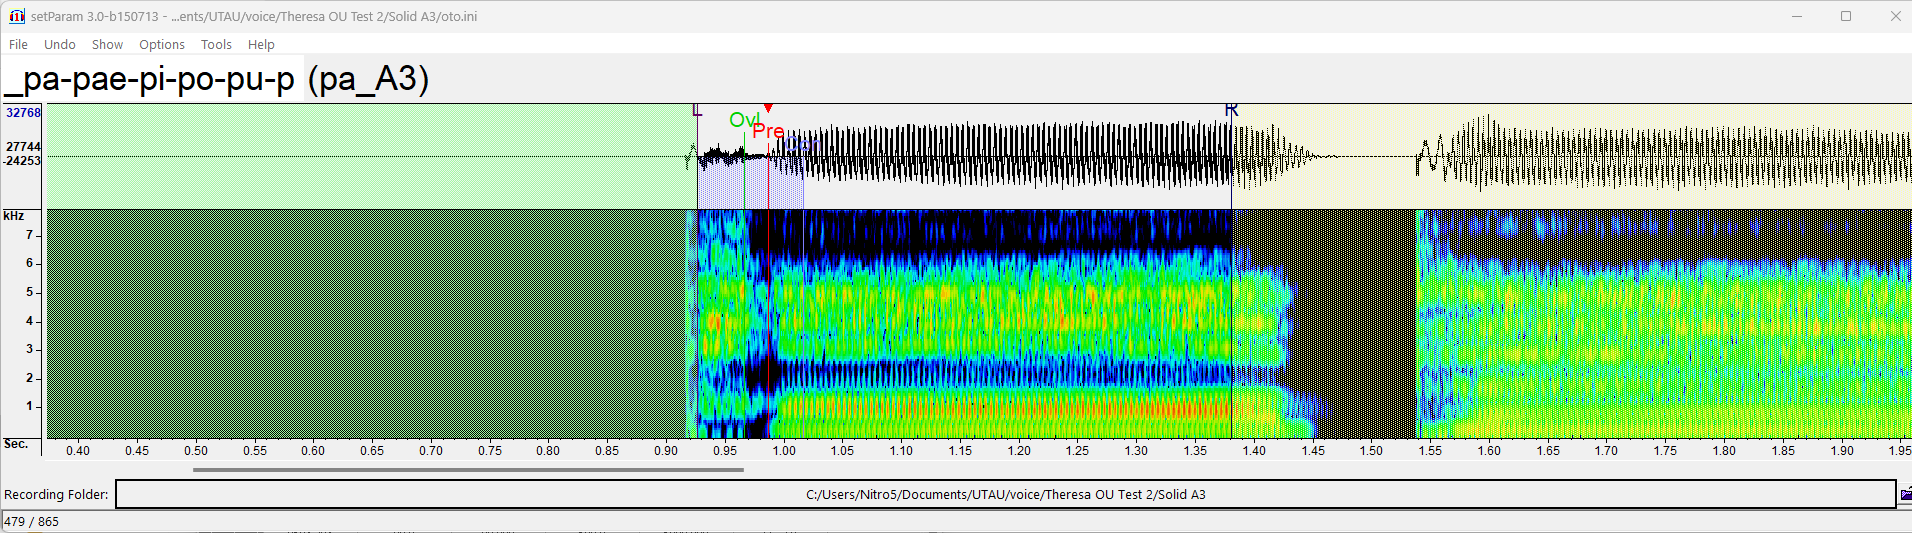
- Plosive CV: Place your green line at the beginning of the consonant, and the red line goes right after it. The pink part covers the consonant and the unstable part of the vowel, while the blue part on the right should cut off the unstable part at the end of the vowel.
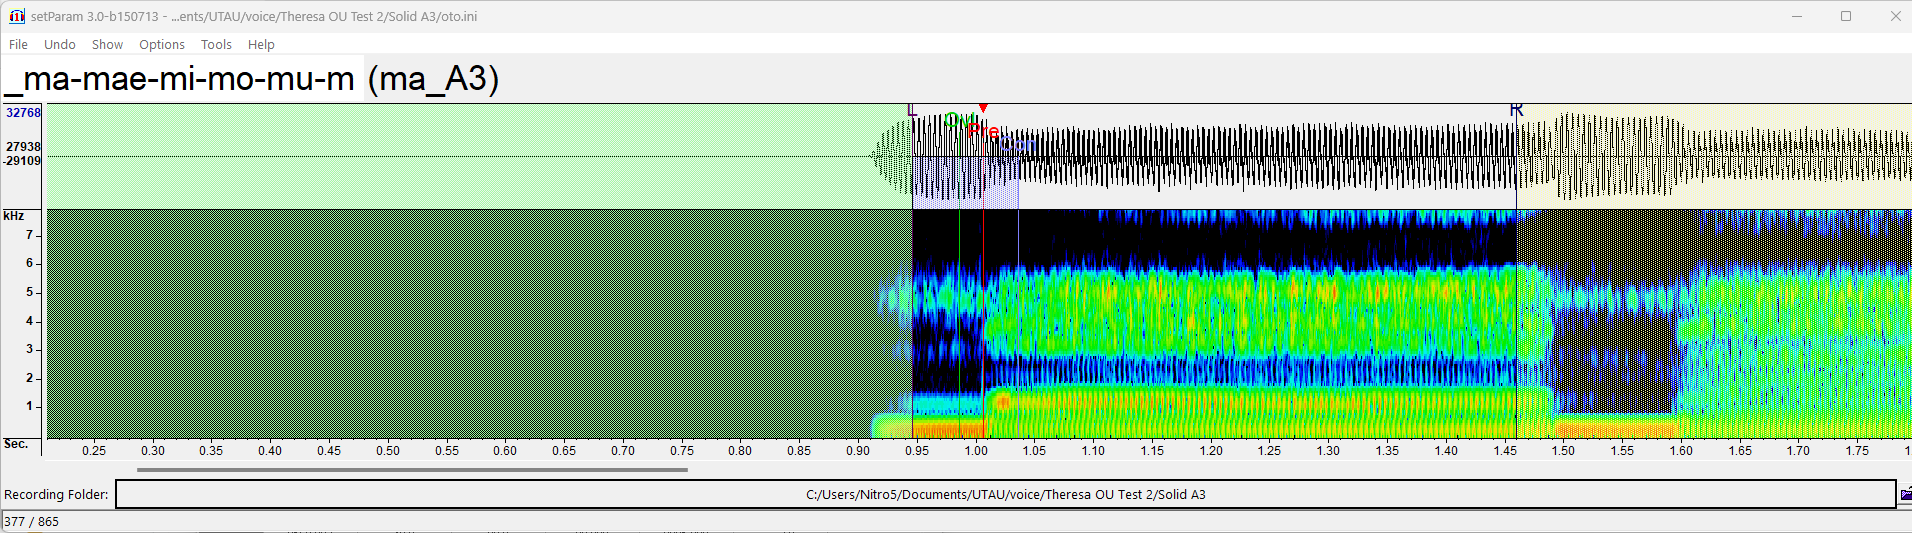
- Nasal, Fricative, and Approximant CV: Place the blue part on the left right after the end of the previous phoneme's vowel. Place the red line after the consonant, and the pink part should cover the consonant and the unstable start of the vowel. The blue part on the right should cut off the unstable end of the vowel.
- Plosive VC: Place your green line at the position where the vowel was consistent for the last time, and the red line goes at the end of the vowel, right before the point where the vowel starts to morph into the consonant. Cover the vowel with pink and the consonant with the blue part on the right. Be sure to loop a soundless point or near soundless point.
- Nasal, Fricative, and Approximant CV: Place your green line at the position where the vowel was consistent for the last time, and the red line goes at the end of the vowel, right before the point where the vowel starts to morph into the consonant. With the pink part and the blue part, loop a point where the consonant is stable.
2) Extra Voicebank
If you're otoing an extra voicebank, here are some specific instructions for various types of phonemes:
Closing Remarks
Remember that otoing a voicebank takes time and patience. Please really check out the Petit Mot CVVC guide, they explain everything so well!
I hope this helps you create your own unique voicebank. Good luck!
- Plosive -C: Place your red line at the beginning of the consonant and the blue part on the right right before the start of the vowel. The pink part should cover most of the sample.
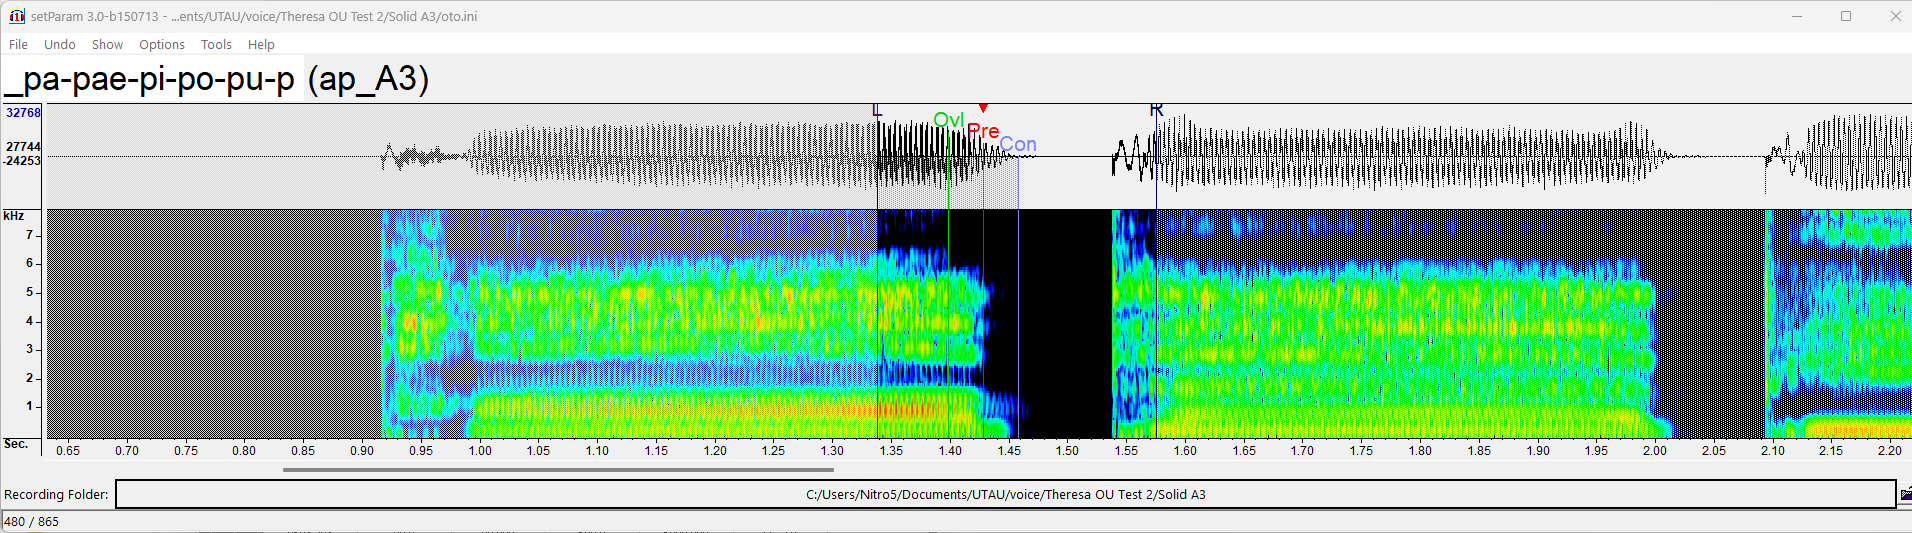
- Plosive C-: Place your red line at the beginning of the consonant. Be sure to cut out the vowel on the left. The pink part should cover the whole consonant and should end on a soundless point. The blue part on the right should end on a soundless point.
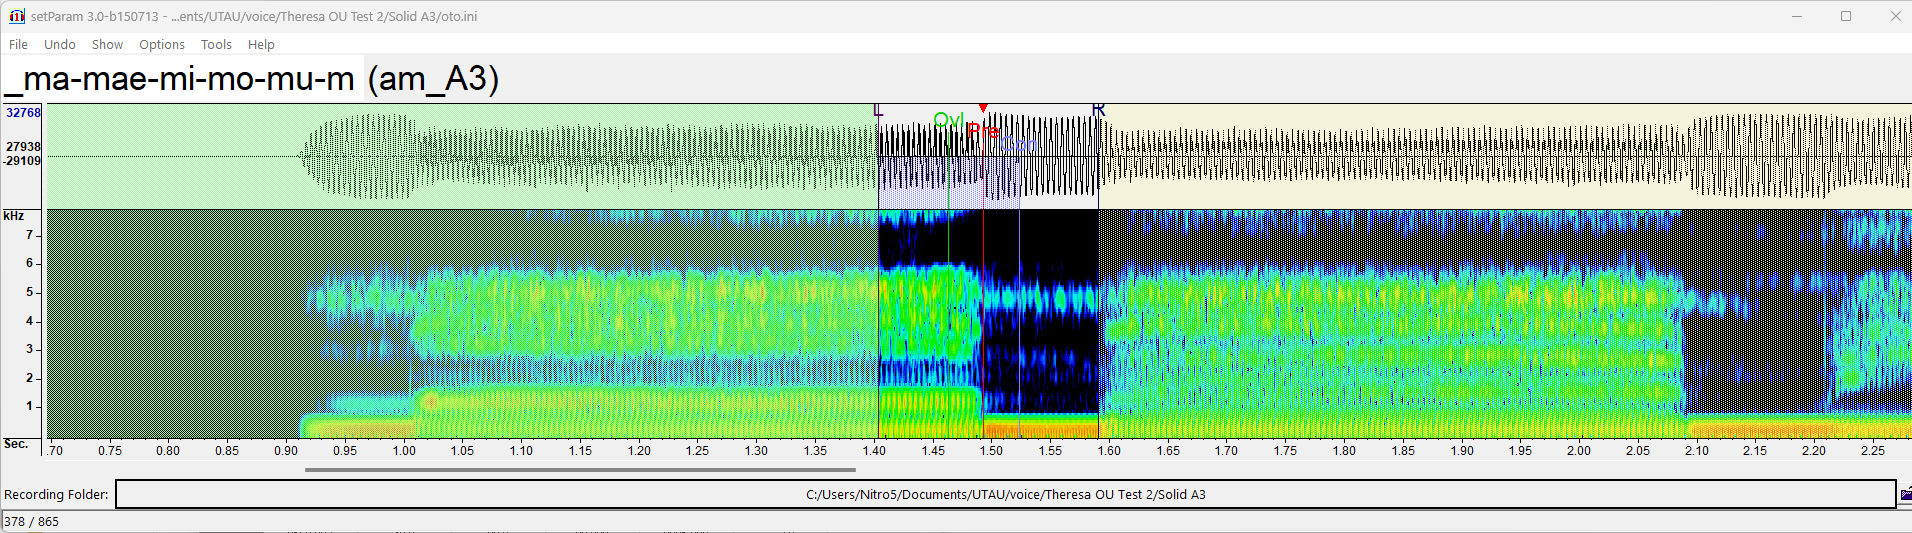
- Nasal, Fricative and Approximant -C: Place your red line at the beginning of the consonant. Place the pink part and the blue part on the right on a stable point of the consonant.
- Nasal, Fricative and Approximant C-: Place the blue part on the right at the end of the vowel. Loop a soundless point.
- CC: Place your green line at the beginning of the consonant. The red line goes right after the consonant cluster. Cover the consonants with pink and loop a stable point.
Closing Remarks
Remember that otoing a voicebank takes time and patience. Please really check out the Petit Mot CVVC guide, they explain everything so well!
I hope this helps you create your own unique voicebank. Good luck!
